So originally I was going to just buy this drying rack from Ballard Designs.

But...it is pretty pricey at $199 not including tax and shipping. Ouch! So I looked around the web and found some DIY options that I thought looked great, like Centsational Girl's take on it, or the one that Embellished Bayou did. I asked my husband if he thought he could tackle it. He was reluctant at first, just because he already has a million projects that need to be done around the house, but then he had a change of heart and was off to Lowe's.
So here's the materials list.
- (2) 1 X 3 X 8 pieces of wood
- (1) 1 X 2 X 8 piece of poplar (that we had laying around)
- (7) 1/2 inch dowels
- wood beadboard 32 X 48
- (2) small hinges
- chain
-hanging hardware
-finish nails
-wood glue
First a picture frame was made with the 1 X 3 X 8 wood using finish nails and wood glue.

The beadboard was then nailed/glued to the back of the frame. We put the beadboard on the horizontal instead of the vertical for a reason which will be unveiled next week. Am I being mysterious enough?

Then the 1 X 2 X 8's were cut to fit inside the box. They were laid next to each other and measured so that each dowel rod would be equidistant. For example, we have 7 dowel rods so he divided the total length by the number of dowel holes needed which is 7. Using a drill bit of the same size as the dowel, drill the holes for the dowels. We (and by we I mean he) used a piece of blue painters tape so they would all be the same depth. Put some glue in the holes and press the dowels into the holes made. It can be a bit tricky pushing the dowels all together, but if you alternate the dowels on each board it makes it easier to push them together. You can shoot a nail through the side pieces into the end of the dowel for extra security but it isn't necessary if you use enough glue.

Make sure the length of the dowels plus the outer wood pieces fit nicely in the box you made.

Trim the outer edge of the box to hide the edge of the beadboard. We had some trim laying around that we were able to use. Then paint everything. After everything is painted with several coats, assemble the two pieces together using small hinges.


Use a chain, piece of nylon or toy box hinge to allow the doweled piece to come down so that clothes can hang freely. We used chain so the piece can hang down farther than others I have seen (and allow us to reach the top dowel easily since it's a bit tall).
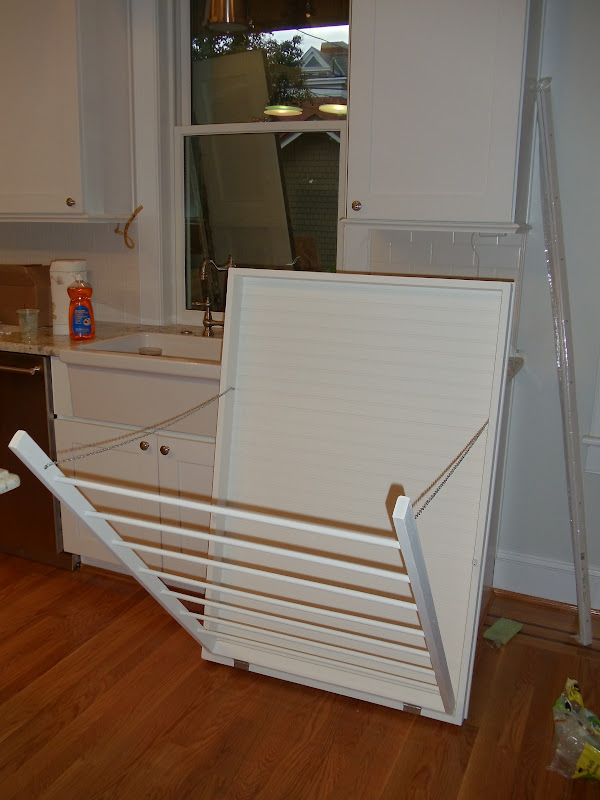
To keep the piece together when not in use, we used clips used to hold storm windows or screens in place

Please excuse all the mess and clutter in the background. My husband is horrified that I took these pictures without tidying up. Whatever.
So what do you think? It cost us around $50 to do. A little more than what the other ladies spent, but it's quite large. Definitely less than it would have cost to buy. Overall I'm very happy with it. I just can't wait to put it up in the laundry room and see how it looks!


Love it! It looks just like the original so that means you got it at 75% off!
ReplyDeleteYour husband is a trouper with all on your plates. But, when I see posts like these I so wish my huband and I had a single handy bone in our bodies!
ReplyDeleteEven Norm from This Old House would be proud.
ReplyDeleteIt looks fantastic, Tiff. He did a great job!
ReplyDeleteCongrats -- it looks great!!
ReplyDeletethat looks awesome! I have been saving the side rail of my son's crib for the same kind of project. For two years. Good for you getting on that :-)
ReplyDeleteWhat a fantastic idea, I love it! You've got me thinking now...I think another item just got added to the to do list!
ReplyDeleteGreat idea to DIY it. I can't believe the cost savings! Oh, if I only had a laundry room, my husband would have one more project added to his list...
ReplyDelete